I made these broccoli and spinach balls last week to take to our neighbor's house for dinner. The original recipe is just for spinach balls but I did half and half. They were really good but there are definitely some changes I would make to the recipe. The recipe calls for 6 eggs. I used five but I think you could get away with using four eggs. Also it calls for a stick of butter but HALF of a stick would be plenty. Finally I added bread crumbs until the mixture became thick enough to "roll" into balls. The recipe I am posting below will reflect the changes I would make if I made these again. The original recipe came from The Curvy Carrot.
Spinach and Broccoli Bites
1/4 cup unsalted butter
1 small onion, chopped (I used minced onion)
1 teaspoon minced garlic
1 10-ounces packages frozen chopped spinach, thawed and drained
1 10 ounce package of broccoli thawed
8-ounces stuffing mix
4 large eggs
1 cup grated Parmesan cheese
Salt and pepper, to taste
Preheat the oven to 350 degrees. Melt the butter over medium heat in a pan, add the onion and cook til translucent. Add the garlic and cook for 30 seconds. Make sure all of the water is removed from the broccoli and spinach. Combine the stuffing mix, spinach, broccoli, eggs, Parmesan, salt and pepper, and onion/garlic mixture. Combine well. Line a baking sheet with parchment paper. Roll the mixture into individual 1-inch balls. Place each one on the parchment-lined baking sheet. Bake the balls for about 15-20 minutes.
Thursday, July 28, 2011
The Easiest BBQ Chicken
I found this recipe on, you guessed it, Pinterest and it was super easy and really good. You could serve the chicken as a whole breast but I shredded it with a fork and ate it as pulled BBQ chicken. The original recipe came from the blog Stick a Fork In It.
BBQ Chicken
4-6 pieces boneless skinless chicken breasts
1 bottle BBQ sauce
1/4 c vinegar
1 tsp. red pepper flakes
1/4 c brown sugar
1/2 - 1 tsp. garlic powder
Mix BBQ sauce with all ingredients listed under it. Place chicken in crock pot and pour the sauce over it. Cook on LOW for 4-6 hours. If serving shredded, take out the breasts, shred with a fork and then add as much sauce from the crock pot until you have the desired amount in your shredded chicken.
BBQ Chicken
4-6 pieces boneless skinless chicken breasts
1 bottle BBQ sauce
1/4 c vinegar
1 tsp. red pepper flakes
1/4 c brown sugar
1/2 - 1 tsp. garlic powder
Mix BBQ sauce with all ingredients listed under it. Place chicken in crock pot and pour the sauce over it. Cook on LOW for 4-6 hours. If serving shredded, take out the breasts, shred with a fork and then add as much sauce from the crock pot until you have the desired amount in your shredded chicken.
Saturday, July 23, 2011
Crescent Roll Breakfast Ring
I found this recipe on Pinterest and I knew it would be a huge hit with Fly Boy and I was correct! This was super easy and I think you could make a ton of changes to the meat and additions to the eggs to always have something different! This recipe came from the blog Bacon Time with The Hungry Hypo.
Crescent Roll Breakfast Ring
1 can Crescent Rolls
5 eggs
Grated cheese
8 pieces of cooked bacon or another desired meat
Lay the 8 triangles from the Crescent Rolls on a piece of parchment paper so that the corners of the base of the triangles meet. It forms a sun type shape. Lay a piece of bacon on each triangle. Spread a little cheese on the bacon. Cook and scramble the egg. Lay the cooked egg over the cheese. Top the egg with more cheese and then pull the tip of the triangle up and over the bacon, egg and cheese mixture to form a wreath or ring. Bake at 350 degrees for 15-17 minutes.
Crescent Roll Breakfast Ring
1 can Crescent Rolls
5 eggs
Grated cheese
8 pieces of cooked bacon or another desired meat
Lay the 8 triangles from the Crescent Rolls on a piece of parchment paper so that the corners of the base of the triangles meet. It forms a sun type shape. Lay a piece of bacon on each triangle. Spread a little cheese on the bacon. Cook and scramble the egg. Lay the cooked egg over the cheese. Top the egg with more cheese and then pull the tip of the triangle up and over the bacon, egg and cheese mixture to form a wreath or ring. Bake at 350 degrees for 15-17 minutes.
Chili Lime Steak Rub from Our Best Bites
Last week I made this steak rub from, you guessed it, Our Best Bites and Fly Boy grilled the steak. It was REALLY good. I have yet to make something from their blog or cookbook that I have not liked. The rub gave the steak a good flavor but it was not overwhelming. Again, if you have not checked out their blog or the cookbook I high recommend that you do it, NOW!
Chili Lime Steak Rub
From Our Best Bites
1 tsp chili powder
1 tsp granulated garlic
1/2 tsp cumin
1/2 tsp coriander
1/2 tsp oregano
1/8- 1/4 tsp cayenne pepper
3/4 tsp salt
1/4 tsp black pepper
1 lime (about 2 Tbsp lime juice)
1 Tbsp extra virgin olive oil
1-2 lbs flank steak, or other good grilling cut
Mix all dry ingredients and then the wet ingredients. Rub the marinade over the steak and let it sit for 15 minute. Grill as desired.
Chili Lime Steak Rub
From Our Best Bites
1 tsp chili powder
1 tsp granulated garlic
1/2 tsp cumin
1/2 tsp coriander
1/2 tsp oregano
1/8- 1/4 tsp cayenne pepper
3/4 tsp salt
1/4 tsp black pepper
1 lime (about 2 Tbsp lime juice)
1 Tbsp extra virgin olive oil
1-2 lbs flank steak, or other good grilling cut
Mix all dry ingredients and then the wet ingredients. Rub the marinade over the steak and let it sit for 15 minute. Grill as desired.
Thursday, July 14, 2011
Chicken and Shrimp Mexican "Lasagna"
A lot of times I find recipes that I want to make and as I am reading the ingredients I either don't like them or I do not have them handy. I had printed a recipe for a shrimp enchilada bake and realized that it had green salsa and green enchilada sauce in it. I don't like any kind of green Mexican sauce so I improvised! Also I didn't have a ton of shrimp and I had some leftover chicken so I just combined the two. This meal was really good and I realized I am obsessed with refried beans with melted cheese!!!
2 cups of cooked shrimp/chicken
1 can corn
2 cups salsa divided
1 can refried beans
6-9 corn or four tortillas
Shredded cheese
Mix chicken/shrimp, corn and 1 cup of salsa (or enchilada sauce) in a microwavable container. Microwave on high for two minutes. In a small casserole dish spread a thin layer of salsa on the bottom of the dish. Layer tortillas over the salsa. Spread refried beans over the tortilla and then spread some of the chicken/shrimp mixture over the beans. Keep layering as desired. On top of the last layer of tortillas spread refried beans and salsa. Bake for 20 minutes at 350 degrees and five minutes before it is done spread cheese on the very top of the "lasagna". We ate ours with guacamole.
2 cups of cooked shrimp/chicken
1 can corn
2 cups salsa divided
1 can refried beans
6-9 corn or four tortillas
Shredded cheese
Mix chicken/shrimp, corn and 1 cup of salsa (or enchilada sauce) in a microwavable container. Microwave on high for two minutes. In a small casserole dish spread a thin layer of salsa on the bottom of the dish. Layer tortillas over the salsa. Spread refried beans over the tortilla and then spread some of the chicken/shrimp mixture over the beans. Keep layering as desired. On top of the last layer of tortillas spread refried beans and salsa. Bake for 20 minutes at 350 degrees and five minutes before it is done spread cheese on the very top of the "lasagna". We ate ours with guacamole.
Heath Bar Blondies
We had some extra Heath Bar pieces left over from when I make Hello Dolly Bars so I decided to browse Pinterest to see what recipes were out there for Heath Bar cookies. While searching the pins I found this super easy (and yummy) recipe for Heath Bar blondies. Less time and less effort sounded good to me!! The recipe is from the blog Lovin' From the Oven.
1 cup All Purpose flour
1/2 tsp baking powder
1/8 tsp baking soda
1/2 tsp salt
1 cup brown sugar
1/2 cup melted butter
1 large egg
1 tsp vanilla
1 cup chopped Heath Bars (I used 1/2 cup Heath toffee bits and 1/2 cup caramel chips)
1.) Preheat oven to 350 degrees.
2.) Cream together the brown sugar and melted butter. Beat in the egg and vanilla. Add the dry ingredients to the batter and mix until blended.
3.) Stir in the Heath Bars and pour into a greased 8x8 pan.
4.) Bake for 30-35 minutes.
1 cup All Purpose flour
1/2 tsp baking powder
1/8 tsp baking soda
1/2 tsp salt
1 cup brown sugar
1/2 cup melted butter
1 large egg
1 tsp vanilla
1 cup chopped Heath Bars (I used 1/2 cup Heath toffee bits and 1/2 cup caramel chips)
1.) Preheat oven to 350 degrees.
2.) Cream together the brown sugar and melted butter. Beat in the egg and vanilla. Add the dry ingredients to the batter and mix until blended.
3.) Stir in the Heath Bars and pour into a greased 8x8 pan.
4.) Bake for 30-35 minutes.
Thursday, July 7, 2011
4th of July Strawberries and Strawberry Mojitos
At the end of my three week journey away from South Texas I stayed for a few days at my inlaw's house near Dallas. My sister in-law wanted to make red, white and blue strawberries that she had seen her cousin make. My mother in-law wanted to make mojitos and I got really excited because I had JUST SEEN a recipe for strawberry mojitos on Pinterest.
The quick description for how to make these mojitos can be found here! Blend together 1 can frozen limeade, 1/2 can (the one that held the limeade) rum, 2 cups frozen strawberries, and a muddled mixture of a few leaves of fresh mint and the pulp of two limes.
For the strawberries you need white chocolate melted with a tsp of oil, washed and dried strawberries and blue sugar. Dip the strawberries in the white chocolate 3/4 of the way up the strawberry. Immediately dip about half way up the strawberry with the blue sugar. Place on wax paper to harden. Afterwards I thought using some cream cheese frosting for the white would taste AMAZING!
Rosemary Focaccia Bread from Our Best Bites
I have returned from pretty much a month in MD (with a stop in Bermuda) and I have kind of gotten the house back in order and my blogging, cooking, crafting urge is at an all time high! I must have let that secret out of the bag because I now have 11 aviator winging banners to sew. Anyway, at some point in the last month or so I made this Rosemary Focaccia bread from one of my favorite websites/cookbooks, Our Best Bites. These ladies get it right EVERY time! This bread was so good that I took it out of the oven, stole a bite and immediately got on Facebook and left them a comment about how awesome it was (AND they "liked" my comment! SCORE!)
The recipe can be found at Our Best Bites.
Monday, June 13, 2011
Peanut Butter Cup Ice Cream
If you like peanut butter in small doses this recipe IS NOT for you. Imagine taking some peanut butter, just adding enough milk to be able to stir it, throw in some Reese's and freeze. That is pretty much what happened here. I LOVE peanut butter so this was amazing to me!! This recipe is from www.recipegirl.com.
You can find the recipe for the ice cream here!
If you like peanut butter in small doses this recipe IS NOT for you. Imagine taking some peanut butter, just adding enough milk to be able to stir it, throw in some Reese's and freeze. That is pretty much what happened here. I LOVE peanut butter so this was amazing to me!! This recipe is from www.recipegirl.com.
You can find the recipe for the ice cream here!
Tuesday, June 7, 2011
Sweet Successes Guest Cook Jamie...Stuffed Zucchini
While I was home in Maryland I made my sister Jamie make this recipe in case it didn't come out and I could blame her! But it came out great. I found this recipe while I was pinning my life away on Pinterest. It came from the blog Kayotic Kitchen. The only change we made was that we added a few more tablespoons of sour cream once we had the veggies all mixed together. It was a little runny so if you added some softened cream cheese in place of a tablespoon or two of sour cream it might thicken it up. Also you might want to precook or grill the zucchini before adding the stuffing and baking.
You can find the recipe here!
Strawberry Cookie Tarts
I was blog stalking a month or so ago and found this recipe at Me and My Pink Mixer. I made these cookie tarts while I was home in Maryland and everyone LOVED them. I think my grandfather loved them the most. He is diabetic and I think he ate at least 6 along with some ice cream cake. He was fine, no worries! You just need some cookie dough, sugar, cool whip and cream cheese. Check out the recipe at Me and My Pink Mixer.
My sister, Caitlin.
My sister, Caitlin.
Muffin Tin Pizzas and a Quick Vent
This is a cooking/crafts/sewing etc blog but I am going to take this opportunity to vent for a second. The job market in my current location is horrible for military spouses. I called the base and they had one job opening that was located at a base 45 minutes away...ummm no thanks! I have looked online, in newspapers, made phone calls and nada. I am open to most jobs however I know I would not find joy in working at Lowes, McDonalds, Loves Travel Stop or a cell phone company. And I do not want to substitute teach. The school year is over but I don't like being the random teacher in the classroom that students think they can take advantage of (though they soon realize that is not an option). So I have come to the realization that for now I am a housewife. I guess I better get going on more cooking and craft projects!
I made dinner for the first time in a week or so last night because I was home in Maryland. When I asked Fly Boy what he wanted he said, "Buffalo chicken pizza!" Of course that is what he wanted but that is not what I wanted! So I decided to make "Muffin Tin Mini Pizzas". They came out really well. I made three different kinds so it was a nice variety.
Ingredients:
1 pizza dough (either store bought or homemade)
sauce
toppings
cheese
Cut the pizza dough into 12 small squares and place them into a greased muffin tin. Try to stretch the dough up the sides of the tin a little bit. Pre bake the dough for 5-7 minutes at about 400 degrees. Take the pan out of the oven and add your toppings. I layered mine: meat/veggies, sauce then cheese. Bake for another 10 minutes or until the cheese is melted.
I made buffalo chicken pizzas, broccoli and chicken and salsa and chicken.
Wednesday, May 18, 2011
Spinach and Shrimp Quesadillas
This was super easy.
Ingredients:
Frozen shrimp
1 package of frozen spinach
Cheese of your choice (I used mozzarella)
Any seasonings you would like to add (I used Parmesan cheese, salt, pepper)
Thaw the shrimp and the spinach according to the package directions. Heat the shrimp and the spinach together in a skillet and season as desired. Layer shrimp mixture and cheese on a tortilla and heat in a quesadilla maker or on a frying pan on medium heat until cheese is melted.
Texas Flour Tortillas
I have no clue how I found the blog called The Homesick Texan...I think it was when I was looking up recipes for Hello Dolly bars. Anyway, I browsed her recipes and saw she had some for corn an flour tortillas so I kept that mental note (which now I could just pin on Pinterest!). Tonight I wanted to make spinach and shrimp quesadillas (which I did and will post the recipe for that too) but we were out of tortillas (I bought 20 a week ago. We have a problem.) So I looked up the recipe and got to work.
Texas Flour Tortillas (adapted from The Border Cookbook by Cheryl Alters Jamison and Bill Jamison)
Ingredients:
Two cups of all-purpose flour (can make them whole wheat by substituting one cup of whole-wheat flour for white flour)
1 1/2 teaspoons of baking powder
1 teaspoon of salt
2 teaspoons of vegetable oil
3/4 cups of warm milk
Method:
Mix together the flour, baking powder, salt and oil.
Slowly add the warm milk.
Stir until a loose, sticky ball is formed.
Knead for two minutes on a floured surface. Dough should be firm and soft.
Place dough in a bowl and cover with a damp cloth or plastic wrap for 20 minutes.
After the dough has rested, break off eight sections, roll them into balls in your hands, place on a plate and then cover balls with damp cloth or plastic wrap for 10 minutes.
After dough has rested, one at a time place a dough ball on a floured surface, pat it out into a four-inch circle, and then roll with a rolling pin from the center until it’s thin and about eight inches in diameter. Keep rolled-out tortillas covered until ready to cook.
In a dry iron skillet heated on high, cook the tortilla about thirty seconds on each side. It should start to puff a bit when it’s done.
Keep cooked tortillas covered wrapped in a napkin until ready to eat.
Can be reheated in a dry iron skillet, over your gas-burner flame or in the oven wrapped in foil.
While you probably won’t have any leftovers, you can store in the fridge tightly wrapped in foil or plastic for a day or so.
Makes eight tortillas.
Go here to check out the Homesick Texan blog!
Texas Flour Tortillas (adapted from The Border Cookbook by Cheryl Alters Jamison and Bill Jamison)
Ingredients:
Two cups of all-purpose flour (can make them whole wheat by substituting one cup of whole-wheat flour for white flour)
1 1/2 teaspoons of baking powder
1 teaspoon of salt
2 teaspoons of vegetable oil
3/4 cups of warm milk
Method:
Mix together the flour, baking powder, salt and oil.
Slowly add the warm milk.
Stir until a loose, sticky ball is formed.
Knead for two minutes on a floured surface. Dough should be firm and soft.
Place dough in a bowl and cover with a damp cloth or plastic wrap for 20 minutes.
After the dough has rested, break off eight sections, roll them into balls in your hands, place on a plate and then cover balls with damp cloth or plastic wrap for 10 minutes.
After dough has rested, one at a time place a dough ball on a floured surface, pat it out into a four-inch circle, and then roll with a rolling pin from the center until it’s thin and about eight inches in diameter. Keep rolled-out tortillas covered until ready to cook.
In a dry iron skillet heated on high, cook the tortilla about thirty seconds on each side. It should start to puff a bit when it’s done.
Keep cooked tortillas covered wrapped in a napkin until ready to eat.
Can be reheated in a dry iron skillet, over your gas-burner flame or in the oven wrapped in foil.
While you probably won’t have any leftovers, you can store in the fridge tightly wrapped in foil or plastic for a day or so.
Makes eight tortillas.
Go here to check out the Homesick Texan blog!
Dress Re-Purpose
Do you ever look at something you purchased in the past and think "What was I thinking?" This happens to me every now and then but since I have started blog stalking I have kept some of these items in hopes that I will find another use for them. In my Pinterest obsession I have seen several tutorials for skirts like this or this. Then I remembered that while I was cleaning out my closet before we moved to Texas I set aside a purple jersey dress that I purchased several years ago. I thought to myself "Why have a kept this?" and then remembered that I met my husband wearing the dress so I wasn't ready to get rid of it. Anyway, this dress was perfect for a re purpose!
So let's not judge here...I like the color and it was super comfy. The neckline was cute and it tied in the back. But what in the world is going on with the gems in the middle? So here is what I did. I cut off the top and cut off the gems.
Then I decided to cut off the layer of fabric that the gems were attached to because it was the texture of a ribbon.. I turned the band that was left into the skirt and then I sewed it down. Now since I have never sewn jersey material before and I was having to turn the skirt the finished band is a bit ruched by accident. However, once you have on a shirt with the skirt you really can't tell.
So here is my final skirt and my toes. I swore they were not in the picture when I took it. The skirt goes to my knees and that is perfect for me because this is a lounging skirt so longer is good for couch sitting. I am wearing it down with a white tank top.
I kept the ties from the back of the dress, the sleeves and yes even those gems. I will find something to do with them!
So let's not judge here...I like the color and it was super comfy. The neckline was cute and it tied in the back. But what in the world is going on with the gems in the middle? So here is what I did. I cut off the top and cut off the gems.
Then I decided to cut off the layer of fabric that the gems were attached to because it was the texture of a ribbon.. I turned the band that was left into the skirt and then I sewed it down. Now since I have never sewn jersey material before and I was having to turn the skirt the finished band is a bit ruched by accident. However, once you have on a shirt with the skirt you really can't tell.
So here is my final skirt and my toes. I swore they were not in the picture when I took it. The skirt goes to my knees and that is perfect for me because this is a lounging skirt so longer is good for couch sitting. I am wearing it down with a white tank top.
I kept the ties from the back of the dress, the sleeves and yes even those gems. I will find something to do with them!
Menu Board
I have a new obsession...it is called Pinterest and it is addicting. You sign up for the website and you can tag anything online onto your Pinterest page. They categorize your pins so you can have fashion pins, DIY pins, quilt pins etc. I like it to catalogue crafts I want to do or clothes I want. In my pinning I came across a menu planner that Emily pinned. I have a ton of extra picture frames sitting around so I went to the office, got a piece of scrapbook paper and cut it to the frame size. I made days of the week labels in word and printed them along with the word MENU. I cut it all out and pasted it on the scrapbook paper. Then I connected an overhead marker from my teaching supply box with some ribbon and hung the menu board in my kitchen. Eventually I want to hot glue magnets on the menu board and put it on the fridge. Sorry for the poor quality picture but my phone camera flash was reflecting off of the glass. PS if you have a circut or silhouette this would come out much nicer I am sure.
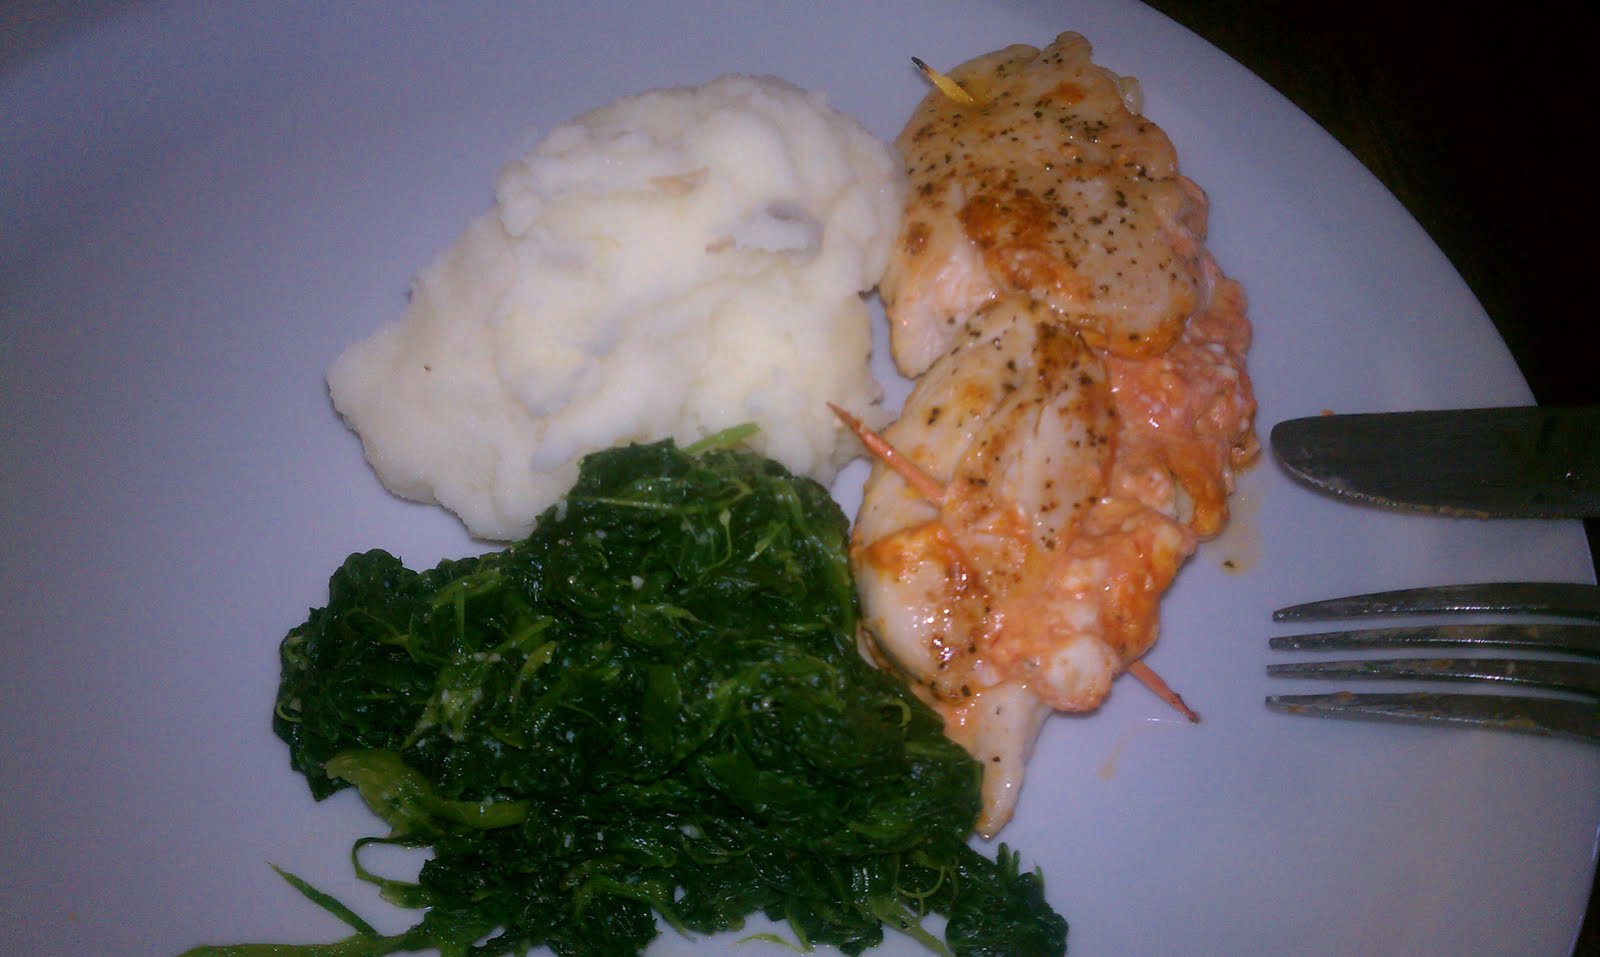
Feta Stuffed Chicken
I got this recipe in an email from Better Homes and Gardens. It came from Diabetic Living Online. It was really good. I did not have tomato basil feta so I added basil and some tomato paste to the cheese mixture. I just used frozen spinach and I made garlic mashed potatoes to go with it. Fly Boy ate 4 of the 6 chicken breasts that I made.
<><><> >
1. In a small bowl combine feta cheese and cream cheese; set aside. Using a sharp knife, cut a horizontal slit through the thickest portion of each chicken breast half to form a pocket. Stuff pockets with the cheese mixture. If necessary, secure openings with wooden toothpicks. Sprinkle chicken with pepper and salt.
2. In a large nonstick skillet cook chicken in hot oil over medium-high heat about 12 minutes or until tender and no longer pink, turning once (reduce heat to medium if chicken browns too quickly). Remove chicken from skillet. Cover and keep warm.
3. Carefully add chicken broth to skillet. Bring to boiling; add half of the spinach. Cover and cook about 3 minutes or just until spinach is wilted. Remove spinach from skillet, reserving liquid in pan. Repeat with remaining spinach. Return all spinach to skillet. Stir in the nuts and lemon juice.
4. To serve, divide spinach mixture among 4 dinner plates. Top with chicken breasts. If desired, garnish with lemon slices. Makes 4 servings.
NOTE: I did not have tomato basil feta so I added a pinch or two of dried basil and a tbsp of tomato paste to the feta/cream cheese mixture. Also I baked my chicken instead of pan frying at 350 degrees for about 25 minutes.
| 2 tablespoons fat-free cream cheese (1 ounce) 1/4 cup crumbled basil-and-tomato feta cheese (1 ounce)* | |
| 4 skinless, boneless chicken breast halves (about 1-1/4 pounds total) | |
| 1/4 teaspoon black pepper | |
| Dash salt | |
| 1 teaspoon olive oil or cooking oil | |
| 1/4 cup chicken broth | |
| 10-ounce package prewashed fresh spinach, trimmed (8 cups) | |
| 2 tablespoons walnut or pecan pieces, toasted | |
| tablespoon lemon juice | |
| Lemon slices, halved (optional) |
1. In a small bowl combine feta cheese and cream cheese; set aside. Using a sharp knife, cut a horizontal slit through the thickest portion of each chicken breast half to form a pocket. Stuff pockets with the cheese mixture. If necessary, secure openings with wooden toothpicks. Sprinkle chicken with pepper and salt.
2. In a large nonstick skillet cook chicken in hot oil over medium-high heat about 12 minutes or until tender and no longer pink, turning once (reduce heat to medium if chicken browns too quickly). Remove chicken from skillet. Cover and keep warm.
3. Carefully add chicken broth to skillet. Bring to boiling; add half of the spinach. Cover and cook about 3 minutes or just until spinach is wilted. Remove spinach from skillet, reserving liquid in pan. Repeat with remaining spinach. Return all spinach to skillet. Stir in the nuts and lemon juice.
4. To serve, divide spinach mixture among 4 dinner plates. Top with chicken breasts. If desired, garnish with lemon slices. Makes 4 servings.
NOTE: I did not have tomato basil feta so I added a pinch or two of dried basil and a tbsp of tomato paste to the feta/cream cheese mixture. Also I baked my chicken instead of pan frying at 350 degrees for about 25 minutes.
Peanut Butter Chocolate Chip Blondies
Another food blog I like to check out is Kaitlin In The Kitchen. She always has really good recipes on her blog. I had a major sweet tooth the other day and decided to make these blondies/brownies. I don't have a picture because Fly Boy ate the entire pan in one day!
Ingredients:
1 1/3 Cups Packed Brown Sugar
1/4 Cup Butter or Margarine, melted
1/2 Cup Peanut Butter
1 Teaspoon Vanilla Extract
3 Eggs
1 1/2 Cups All-Purpose Flour
3/4 Teaspoon Baking Powder
1/4 Teaspoon Baking Soda
1/2 Teaspoon Salt
1 Cup Semi-Sweet Chocolate Chips
Directions:
In large bowl, beat brown sugar, butter or margarine, peanut butter, vanilla, and eggs until well blended. Stir in flour, baking powder, baking soda, and salt; mix well. Spread batter into a greased pan and bake in a pre-heated 350 degree oven for 25 to 30 minutes or until golden brown and toothpick inserted in middle comes out clean.
Wednesday, May 4, 2011
Who Knew I Could Kind of Paint?
A few weeks ago, shortly after moving to South Texas, my neighbor and I were talking about things to do in the area and she mentioned there was a painting studio that you can go to where they teach you how to paint a picture step by step. You also get to drink while you do this! We decided to sign up for one of the classes. In the class we learned how to paint a fancy cross. I, of course, had to paint mine just like the example because thinking of out the box when it comes to painting just isn't my thing. Considering I have zero painting talent I was fairly happy with how my picture turned out.
The reason we decided to do the cross was to get practice for a spouses club social we had for the month of May. Last night we went back to the studio for a private party and had an artist teach us how to paint a T45. I was nervous because I wasn't sure I could actually get it to look like an air plane. I had a bit of help from the instructor with the body of the plane and I only painted one wing wrong so I was proud of myself!
Monday, April 25, 2011
A Fly Boy Feature: Chocolate Mint Ice Cream
As most of you may know "Fly Boy" is my husband and he does not cook! I finally told him he had to make dinner at least once a week. While this recipe does not count as dinner, he was so proud of himself he asked me to post it on my blog. I thought that was cute so I told him I would do a Fly Boy feature anytime he made something new and blog worthy!
Let me give you a little bit of ice cream background about our families. In my family my Granny always had Cookies and Cream ice cream and ice cream sandwiches. She would offer it to you any time of day...after breakfast, lunch or dinner! My parents always have at least three or four half gallons of ice cream in the freezer and usually my mom has a bowl every night. I worked in an ice cream store in high school and my little sister spent a few summers working at another local ice cream joint. Now I thought that having ice cream for dessert with breakfast was a sure sign of ice cream lovers until I met my husband's family.
I thought my family ate a lot of ice cream but when I met Fly Boy I realized I was wrong. He will eat an entire container in one sitting. Ice cream is a side dish to every dessert. When asked if you want cake it appears with ice cream even though there was no mention of ice cream. His grandma always has 5 or six different flavors in her house. We don't buy ice cream now that we are married because it does not last more than a day.
So a few days ago we returned some dishes to Bed, Bath and Beyond and had a ton of left over store credit. In my blog stalking I have seen a lot of recipes for ice cream and I thought it would be fun to have an ice cream maker so we could make our own flavors. We purchased the maker and Fly Boy was itching so bad to make some ice cream that he made it at 10:00 one night. I was impressed with the outcome.
The ice cream directly out of the ice cream maker has more of a milk shake consistency but if you put it in a container and freeze it, it comes out pretty much like store bought ice cream. Fly Boy made this Chocolate Mint Ice cream and I was impressed. It does melt fairly fast as you can see in the picture below.
Be sure to read the directions that come with your ice cream maker before starting. Ours you have to freeze the bucket for about 12 hours.
1 1/2 cups whole milk
3/4 cup chocolate syrup
3 tbsp sugar
3 cups heavy cream
1 tsp mint extract
1 cup chocolate candies (we just used chocolate chips)
In a mixing bowl, combine the first three ingredients until sugar is dissolved. Add the heavy cream and mint. Pour into ice cream maker and mix for 20-25 minutes. Five minutes before the mixing is complete, add the chocolate candies. Place mixture in an air tight container and freeze for at least two hours.
Let me give you a little bit of ice cream background about our families. In my family my Granny always had Cookies and Cream ice cream and ice cream sandwiches. She would offer it to you any time of day...after breakfast, lunch or dinner! My parents always have at least three or four half gallons of ice cream in the freezer and usually my mom has a bowl every night. I worked in an ice cream store in high school and my little sister spent a few summers working at another local ice cream joint. Now I thought that having ice cream for dessert with breakfast was a sure sign of ice cream lovers until I met my husband's family.
I thought my family ate a lot of ice cream but when I met Fly Boy I realized I was wrong. He will eat an entire container in one sitting. Ice cream is a side dish to every dessert. When asked if you want cake it appears with ice cream even though there was no mention of ice cream. His grandma always has 5 or six different flavors in her house. We don't buy ice cream now that we are married because it does not last more than a day.
So a few days ago we returned some dishes to Bed, Bath and Beyond and had a ton of left over store credit. In my blog stalking I have seen a lot of recipes for ice cream and I thought it would be fun to have an ice cream maker so we could make our own flavors. We purchased the maker and Fly Boy was itching so bad to make some ice cream that he made it at 10:00 one night. I was impressed with the outcome.
The ice cream directly out of the ice cream maker has more of a milk shake consistency but if you put it in a container and freeze it, it comes out pretty much like store bought ice cream. Fly Boy made this Chocolate Mint Ice cream and I was impressed. It does melt fairly fast as you can see in the picture below.
Be sure to read the directions that come with your ice cream maker before starting. Ours you have to freeze the bucket for about 12 hours.
1 1/2 cups whole milk
3/4 cup chocolate syrup
3 tbsp sugar
3 cups heavy cream
1 tsp mint extract
1 cup chocolate candies (we just used chocolate chips)
In a mixing bowl, combine the first three ingredients until sugar is dissolved. Add the heavy cream and mint. Pour into ice cream maker and mix for 20-25 minutes. Five minutes before the mixing is complete, add the chocolate candies. Place mixture in an air tight container and freeze for at least two hours.
Subscribe to:
Posts (Atom)